Pull, Push and branches
Daily work with a Git source: how to fetch changes from the repository, send yours, review the diff before an operation, create and switch branches, and what Hard Pull does.
With an active Git source the plugin footer has three buttons: Refresh checks the repository state, Pull fetches changes, Push sends yours. A blue dot on a button means there is something to fetch or send. The plugin checks the repository on its own once a minute and when you return to the Figma window.
Pull: fetch changes
- Press Pull in the footer. The Pull Changes window opens.
- On the left is the list of changed files with filters by change type: new, modified, deleted. On the right is a comparison of the plugin version and the repository version.
- Press Pull to apply the changes. Cancel closes the window without changes.
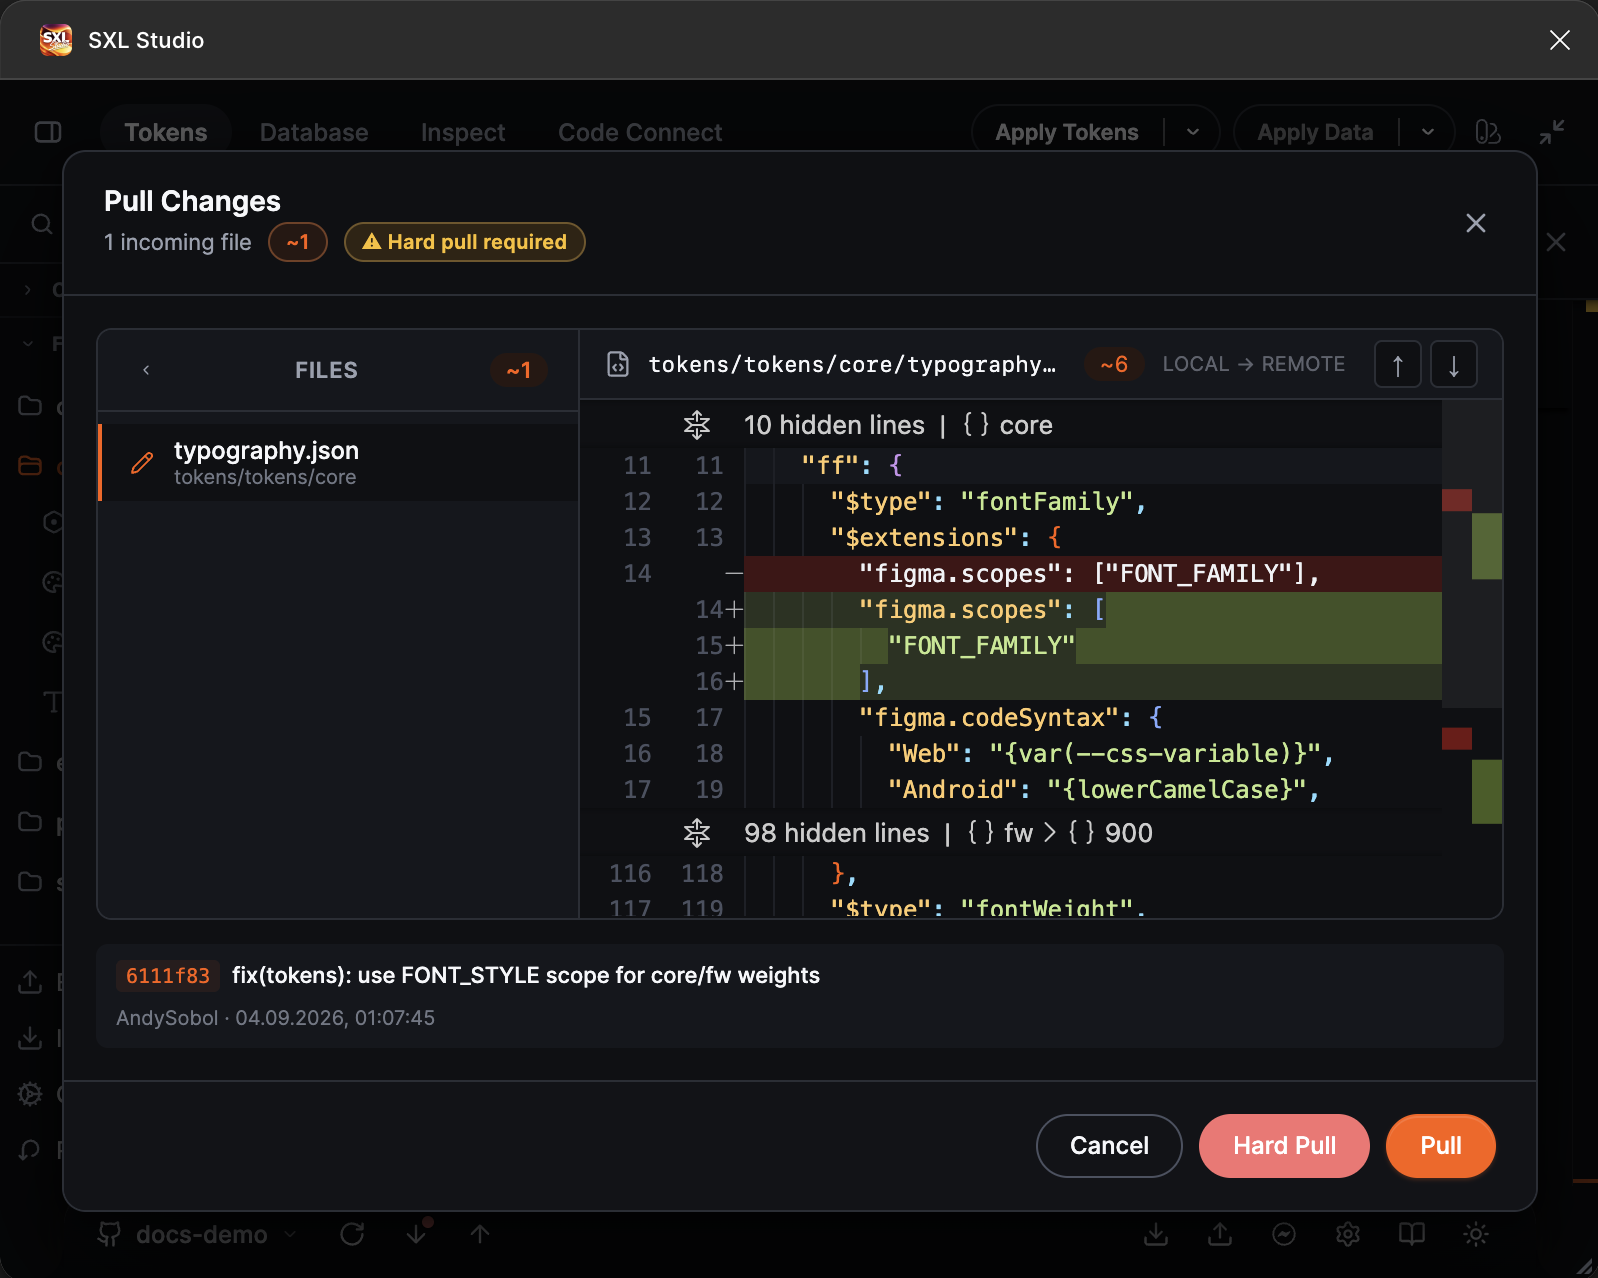
The Pull Changes window: one incoming file, the Local and Remote comparison, the last commit with author and time.
The window header shows the number of incoming files and the counts of added, modified and deleted ones. At the bottom is the last commit of the branch: short hash, message, author and time.
If there are no changes, the window says Repository is up to date and the Pull button is disabled.
During a Pull a progress indicator runs under the footer button, and the file tree is temporarily empty: the plugin loads the files again.
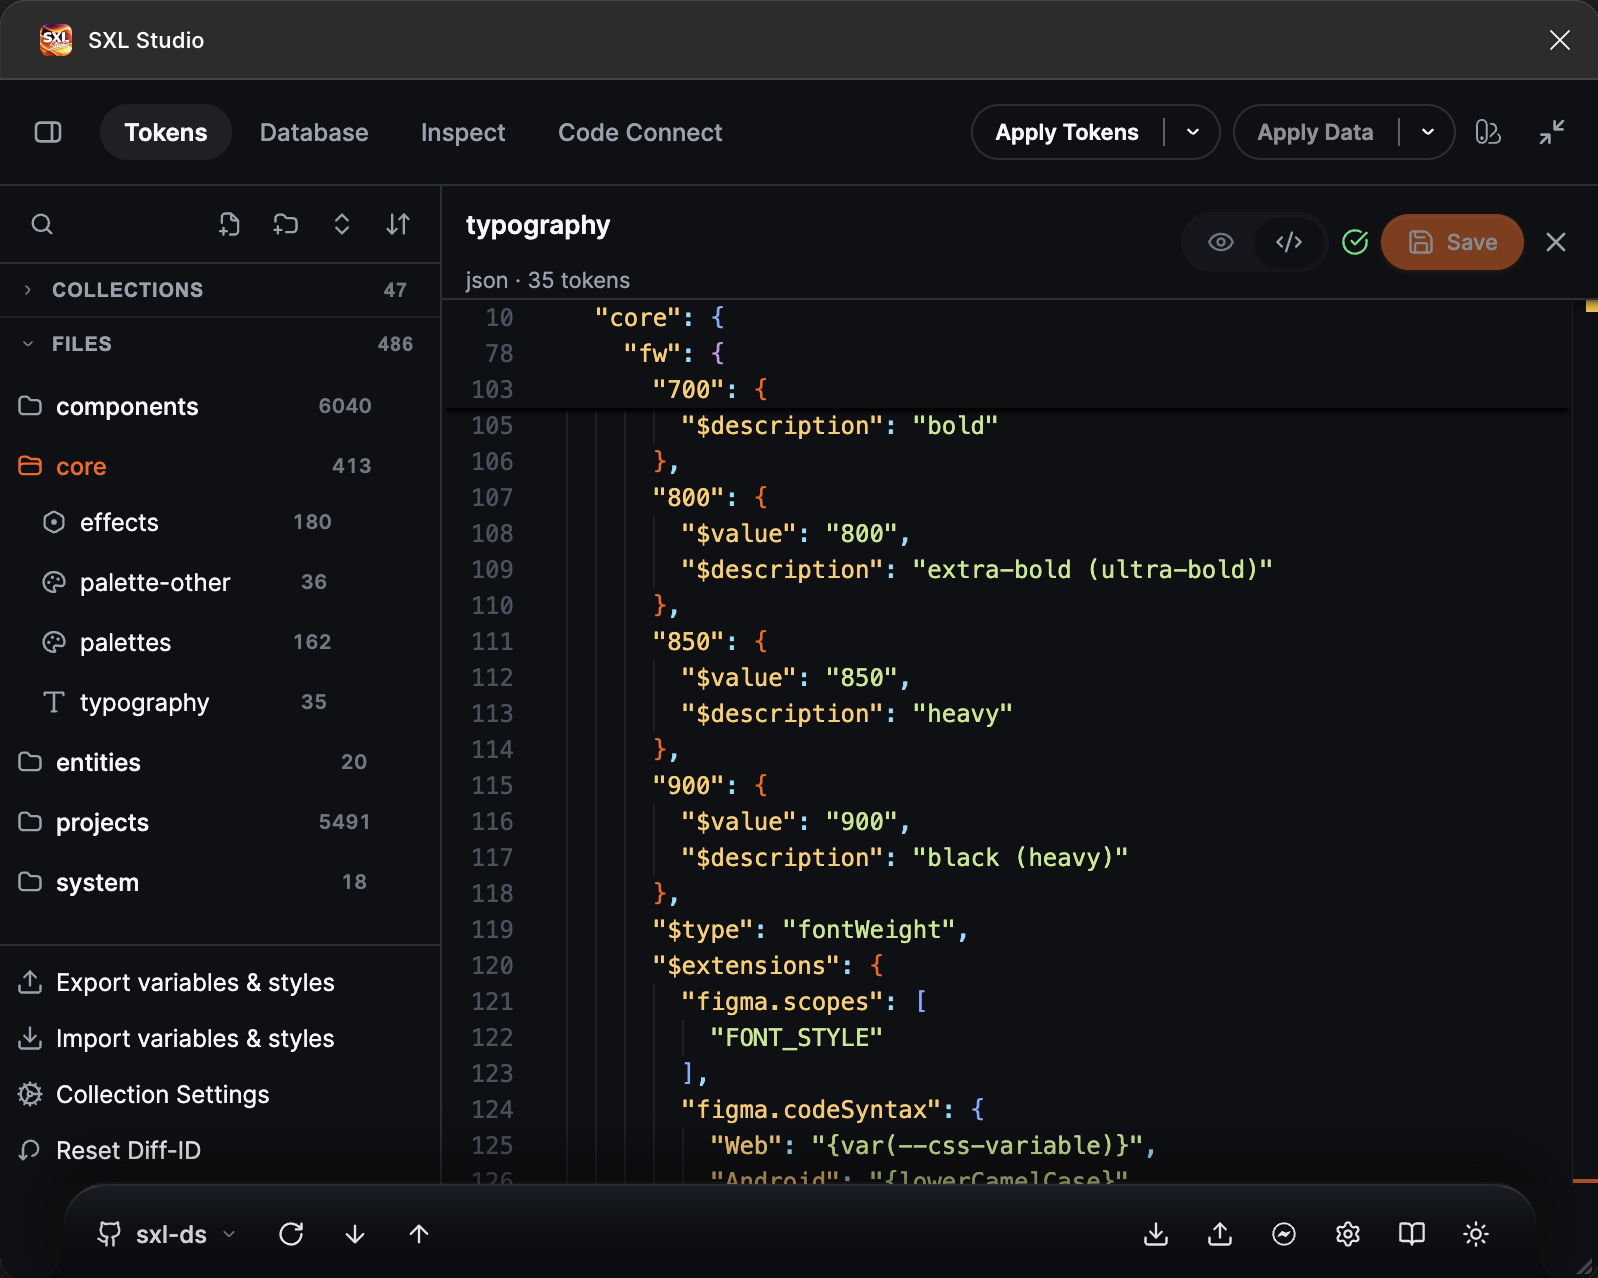
Pull in progress: the file tree is empty, the footer shows the loading indicator.
When it finishes, the plugin shows a message like Synced: 12 updated, 1 deleted. If some files could not be loaded, the message asks you to run Pull again.
Hard Pull
The orange Hard pull required chip in the window header means that the repository, branch or the Tokens Path and Data Path folders changed since the last Pull. In that case a regular Pull first clears the plugin's local data and then loads everything again, so files from different branches do not mix. The Hard Pull button does the same on demand: use it when the local state looks broken and you want everything from the repository again.
Hard Pull does not touch the repository; it only rewrites the plugin's data.
Push: send changes
- Change tokens in the plugin and save the file.
- Press Push in the footer. The Push Changes window opens with the file list and a comparison: the repository version on the left, yours on the right.
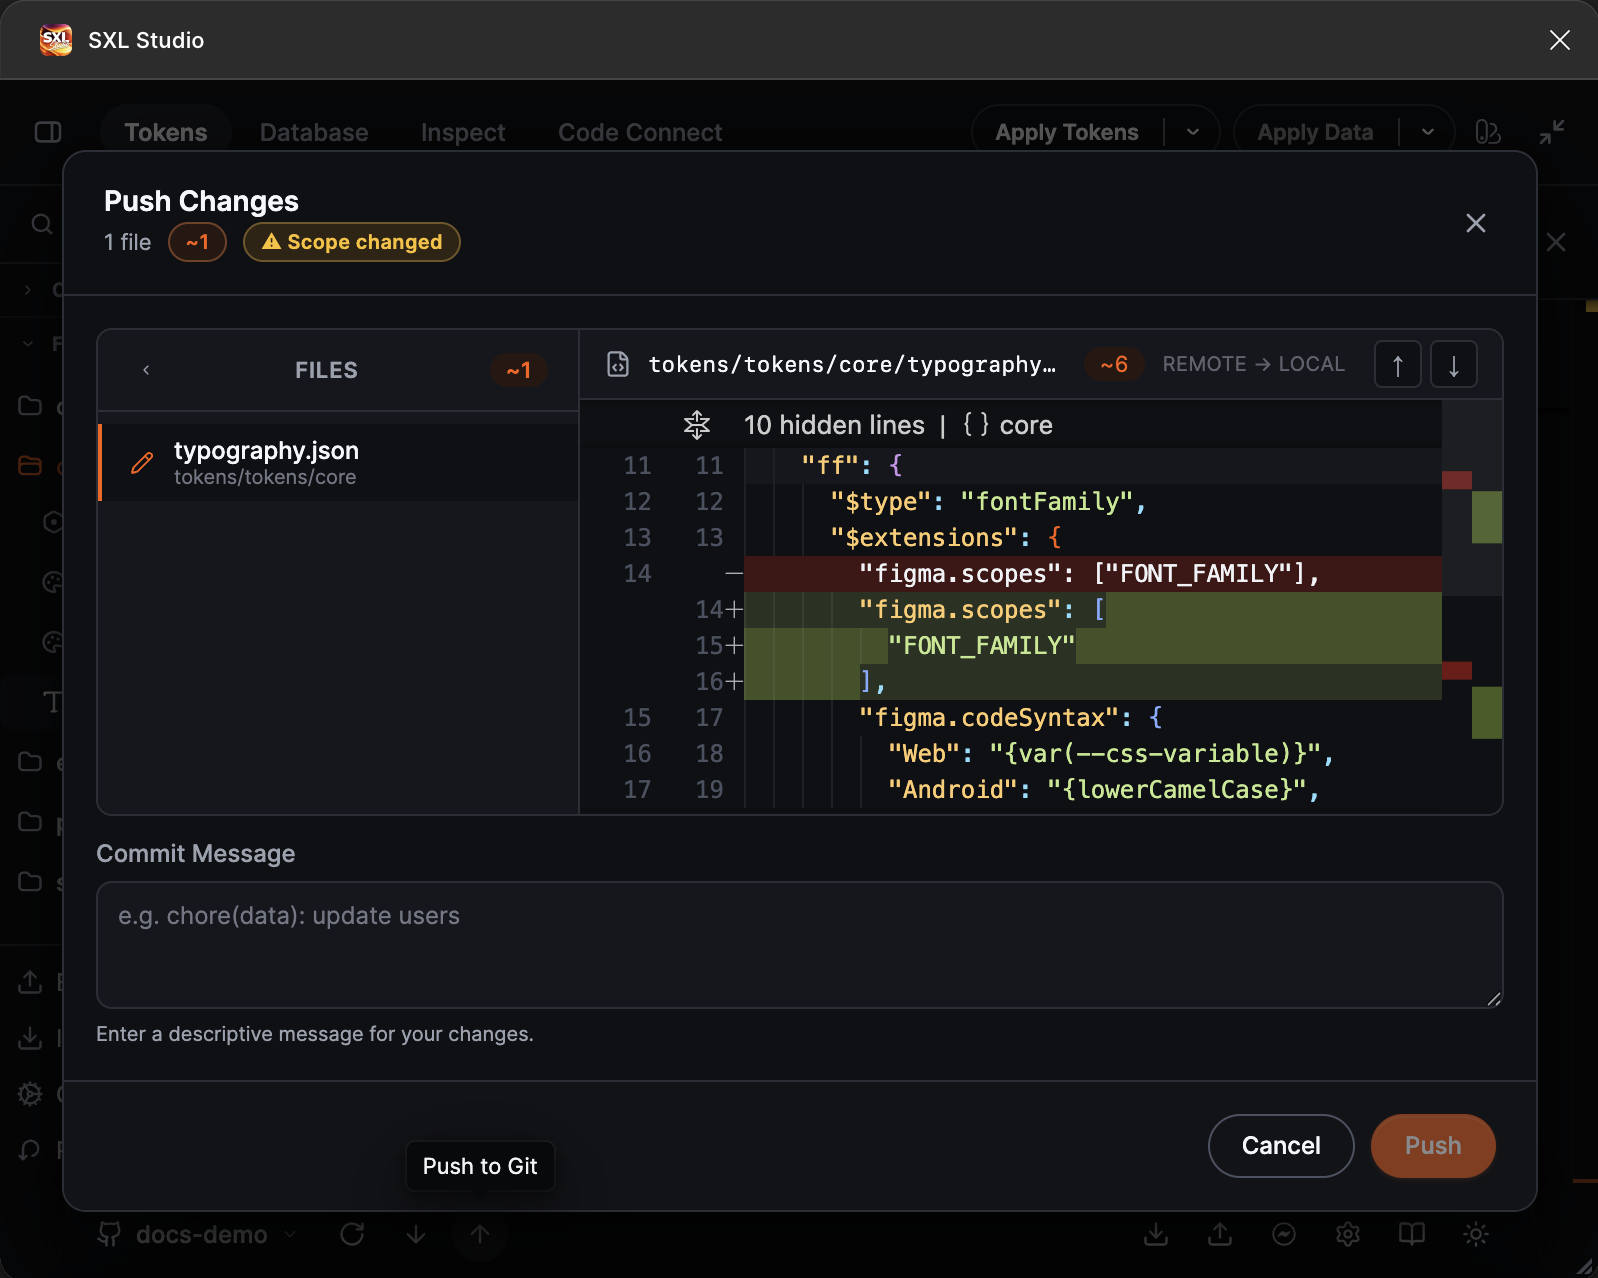
The Push Changes window: the changed file and the line-by-line comparison.
- Enter a commit message and press Push.
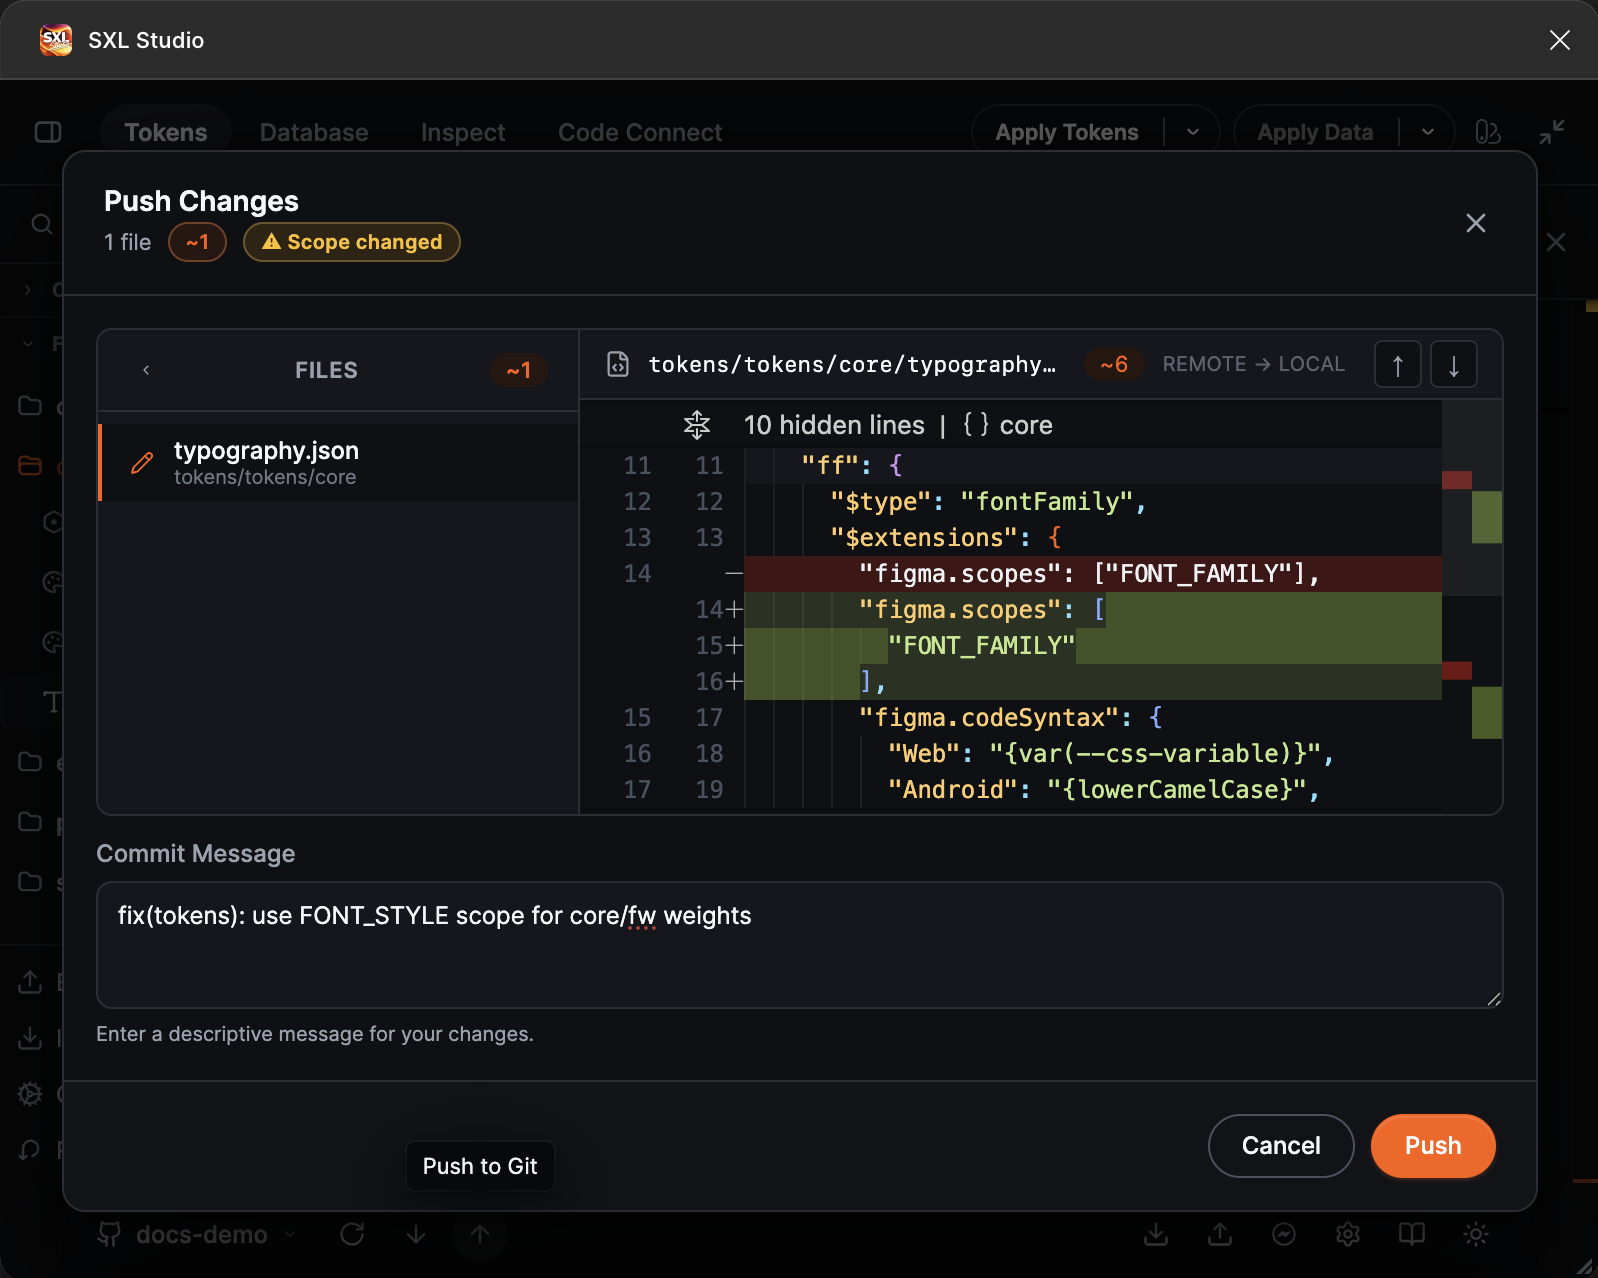
A filled-in commit message. For GitLab the Show format guide link offers Conventional Commits examples.
The plugin creates one commit with all changed files: tokens, Database data, mappings and images. When it finishes, the message Pushed: N updates, M deletes and the Push completed notification appear in the plugin.
The Scope changed chip in the header warns that the repository, branch or folders changed after the last Pull: make sure you are sending the changes where you intended.
If there are no changes, the plugin says No changes to push. If the connection has no Tokens Path, token files are left out of the Push, and the plugin warns about it separately.
Comparing files
Both windows use the same comparison:
- The arrows above the comparison and the F7 and Shift+F7 keys jump between changes.
- The Files panel can be collapsed so the comparison takes the full width.
- The ≈ mark next to a file means the content differs only in line endings or whitespace; the file still goes into the commit.
- Very large files, over 1 MB or 10,000 lines, are not shown line by line to keep the plugin responsive. The change is still counted, and you can review it in the repository.
- Images and other binary files appear as a list row without a comparison.
Branches
The branch is chosen in the menu that opens from the source chip in the footer. It lists the repository branches, has a search field and a refresh button. Choosing a branch switches the plugin to it; press Pull afterwards to load its contents. The plugin reminds you: Branch changed. Run Pull to sync.
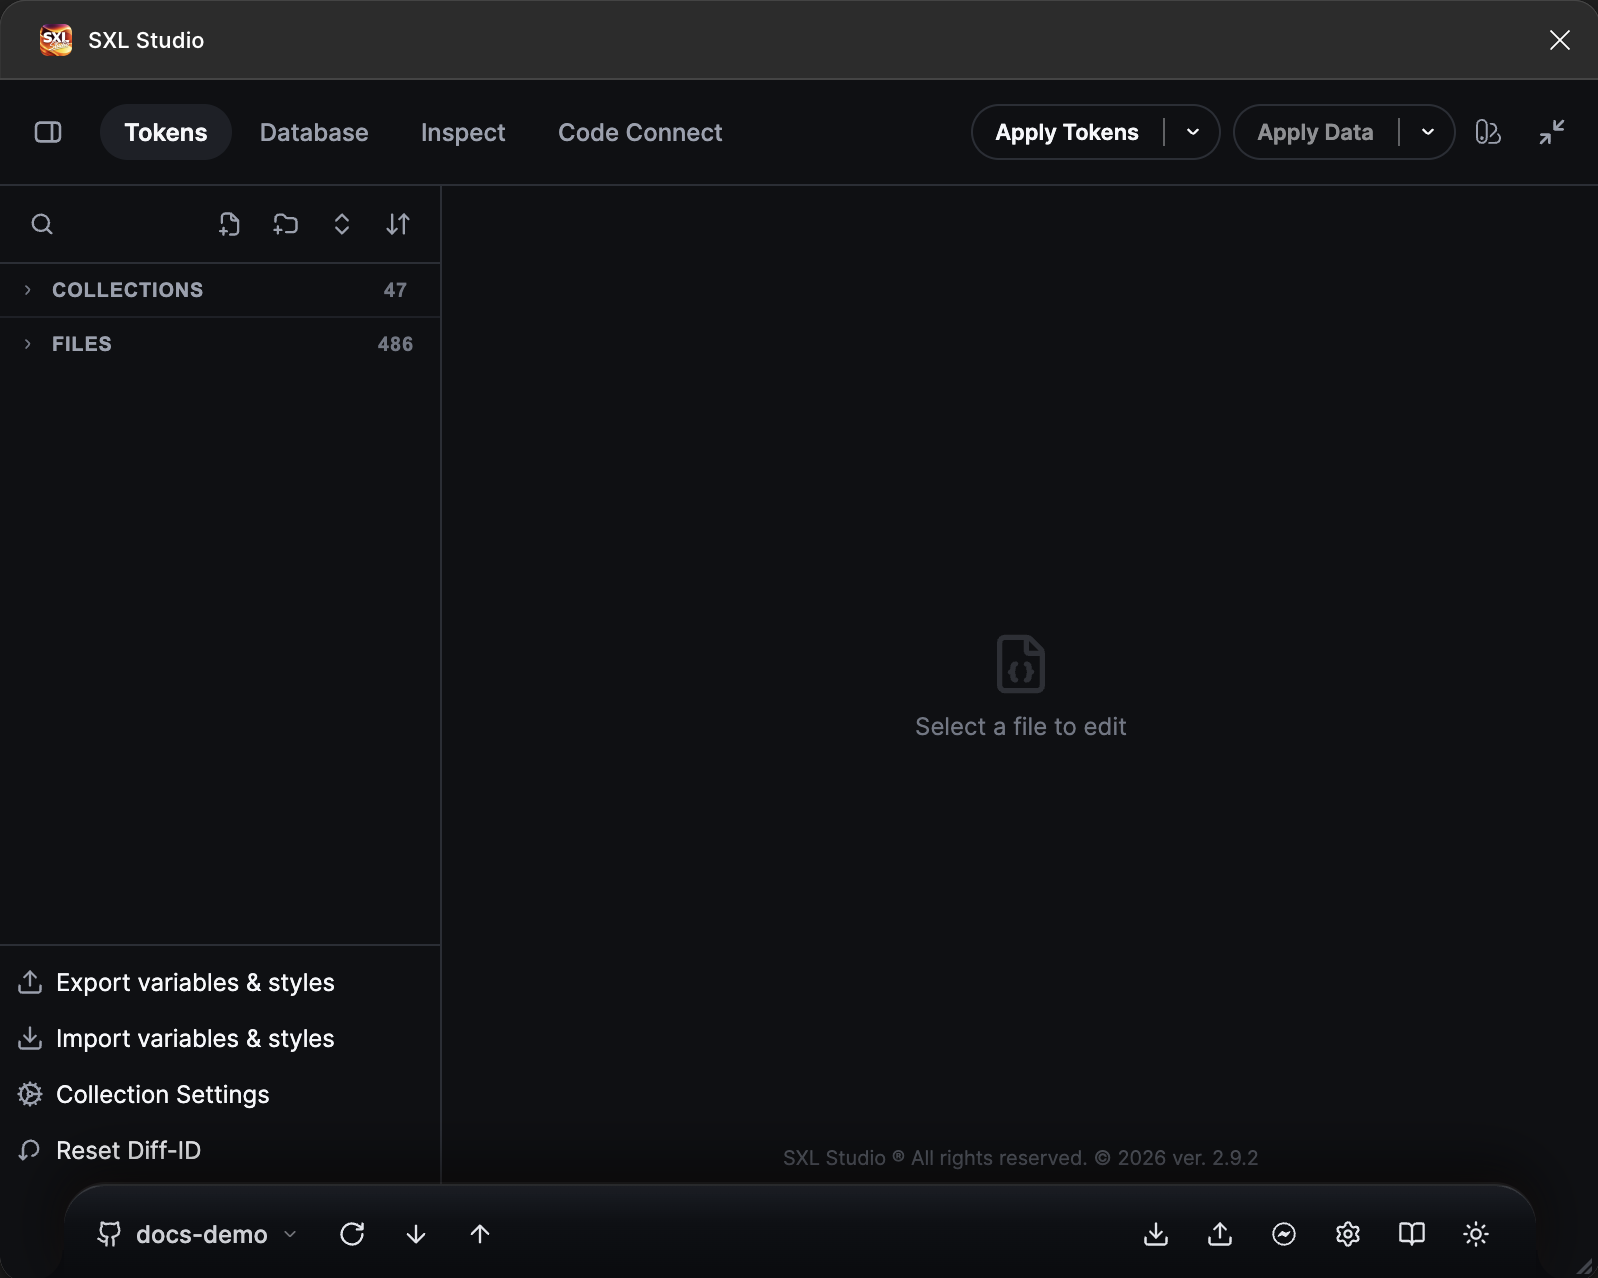
After switching, the footer shows the new docs-demo branch.
Create a branch
- Create Branch creates a branch from the current one.
- Create Branch From... creates a branch from any other one: choose the source in the Source Branch list.
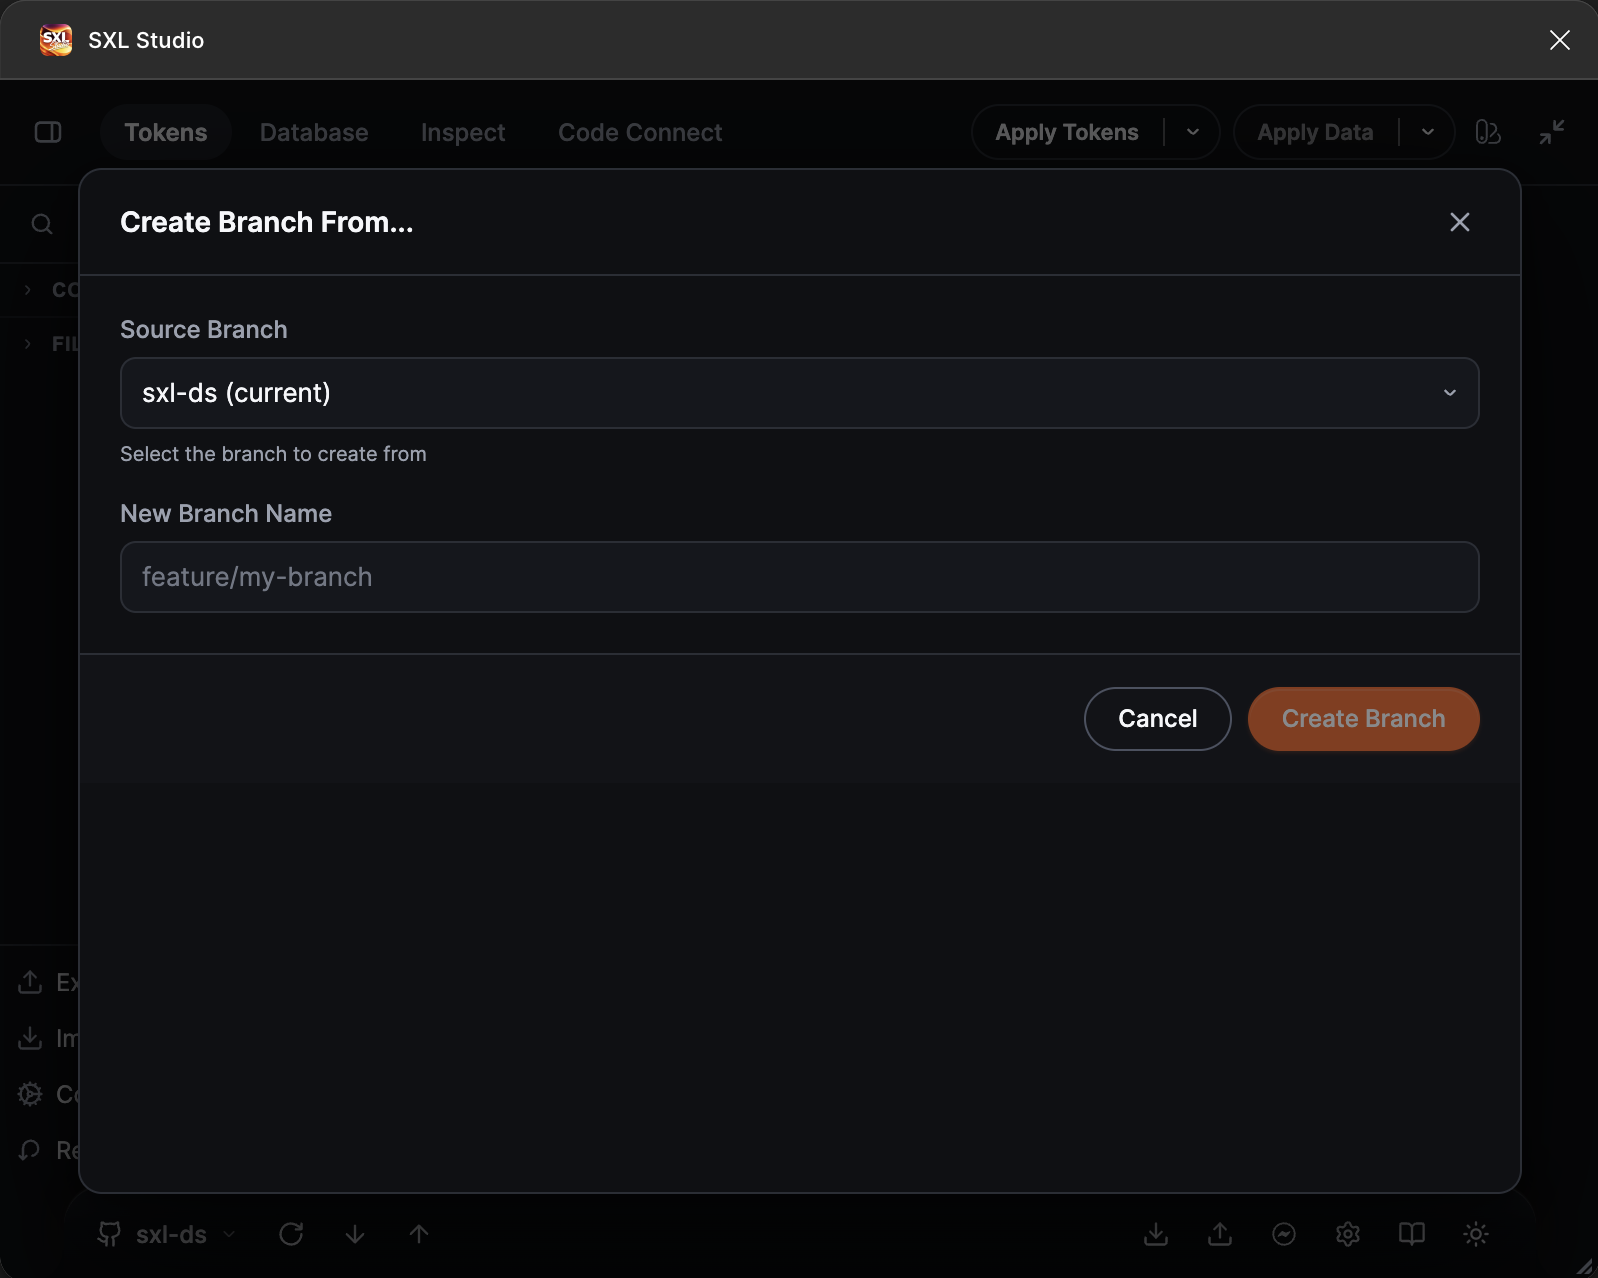
The Create Branch From window: the source branch and the new name.
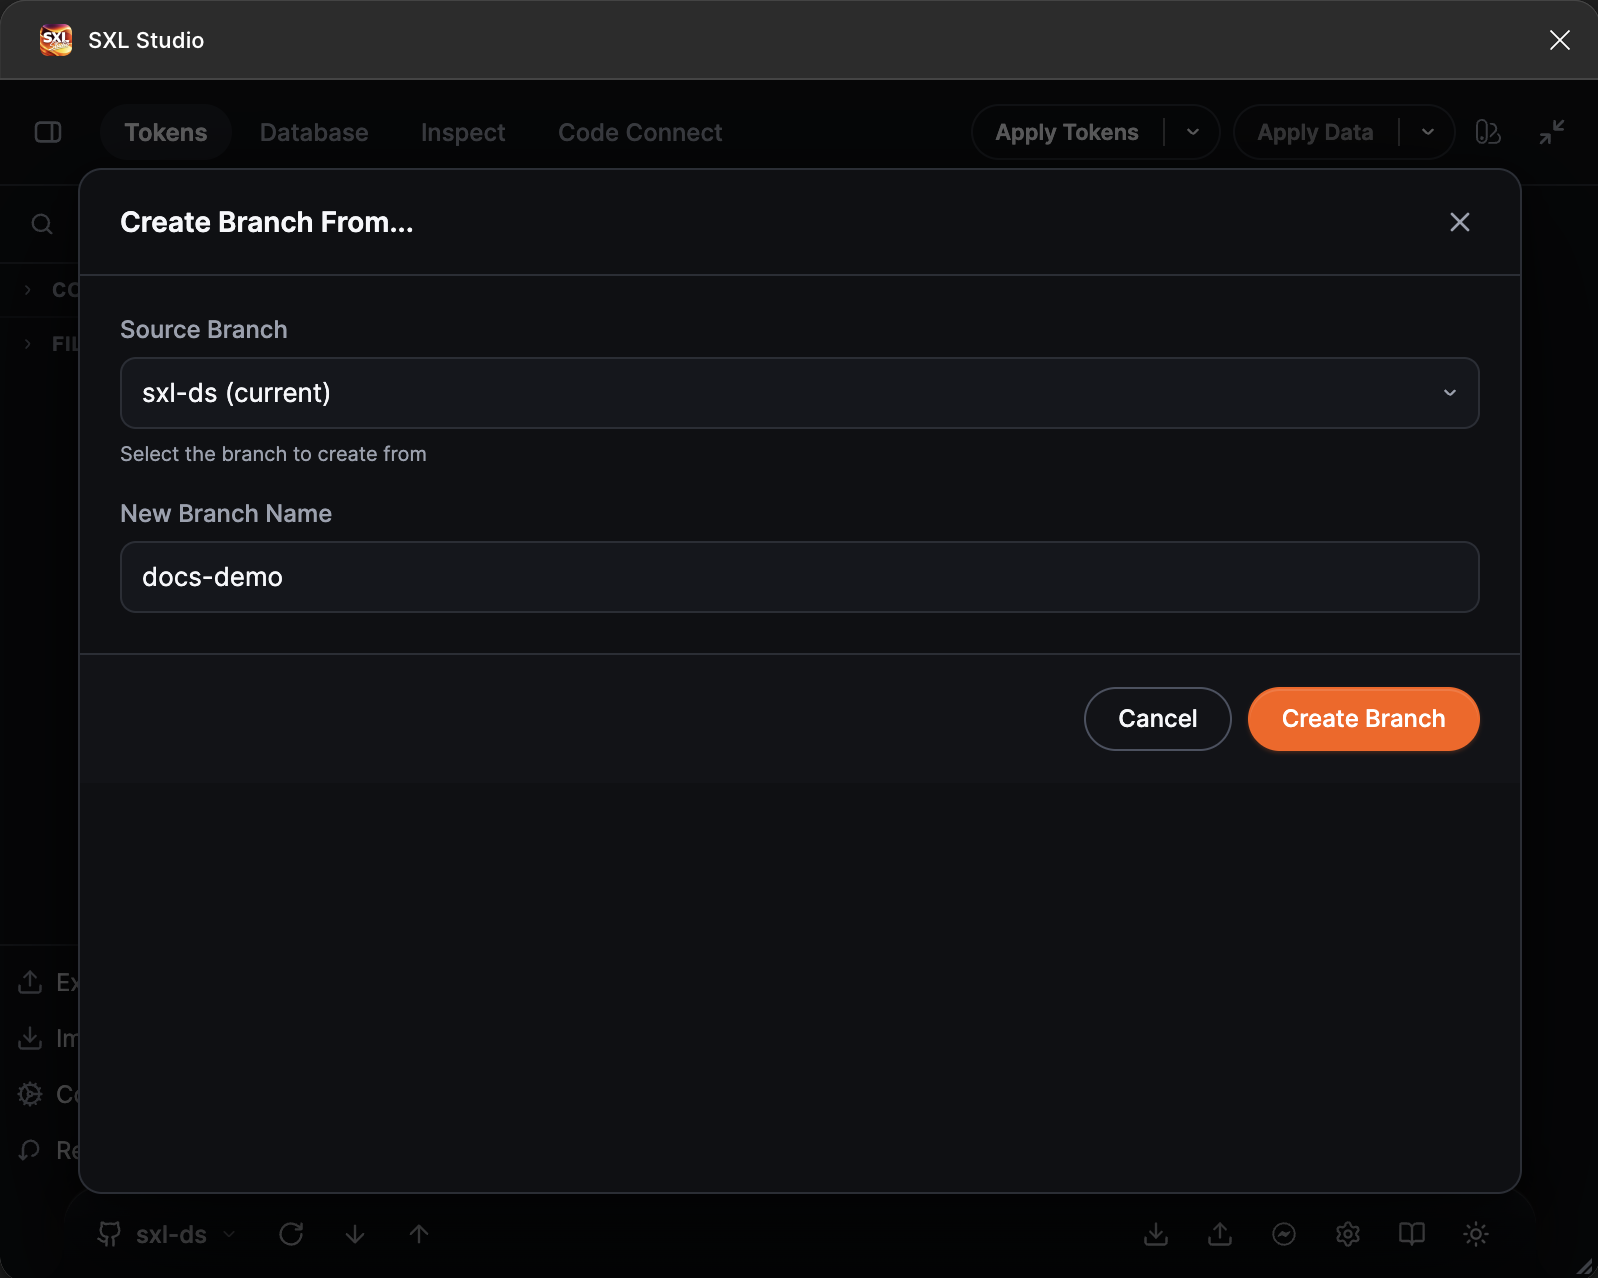
The new branch name docs-demo. The plugin validates the name against Git rules: no spaces, no "..", no ".lock" ending.
After Create Branch the branch appears in the repository, the plugin switches to it and suggests a Pull.
Branches let you prepare token changes apart from the main branch and send them for review with a regular pull request in GitHub or GitLab. The plugin works with any branch the same way.
If something does not work
| What happened | What to do |
|---|---|
| Pull and Push are disabled | The active source is not Git. Choose a connection in the footer menu |
| Remote repo is too large and the buttons are blocked | The provider returned an incomplete file listing. Narrow Tokens Path and Data Path in the connection |
| Push rejected | The server did not accept the commit message. For GitLab open Show format guide and adjust the message |
| Protected Branch | The branch cannot be written directly. Create another branch and work there |
| Variables in Figma did not update after a Pull | Pull changes only the files in the plugin. Press Export variables & styles to update the variables, or enable auto-export after Pull in config.json |
| Pull stops with a message about SXL Bridge | The connection has Local Storage on and Bridge is not running. Start Bridge and try again |
| You want to see what happened | Diagnostics tab → the log command |