Tokens tab
What is on the Tokens tab: the file and collection tree, the visual and code editor, creating tokens, Apply Tokens, exporting and importing variables and styles.
The Tokens tab is the centre of design system work. Token JSON files live here, Figma variables and styles are created from them, and tokens are applied to layers from here.
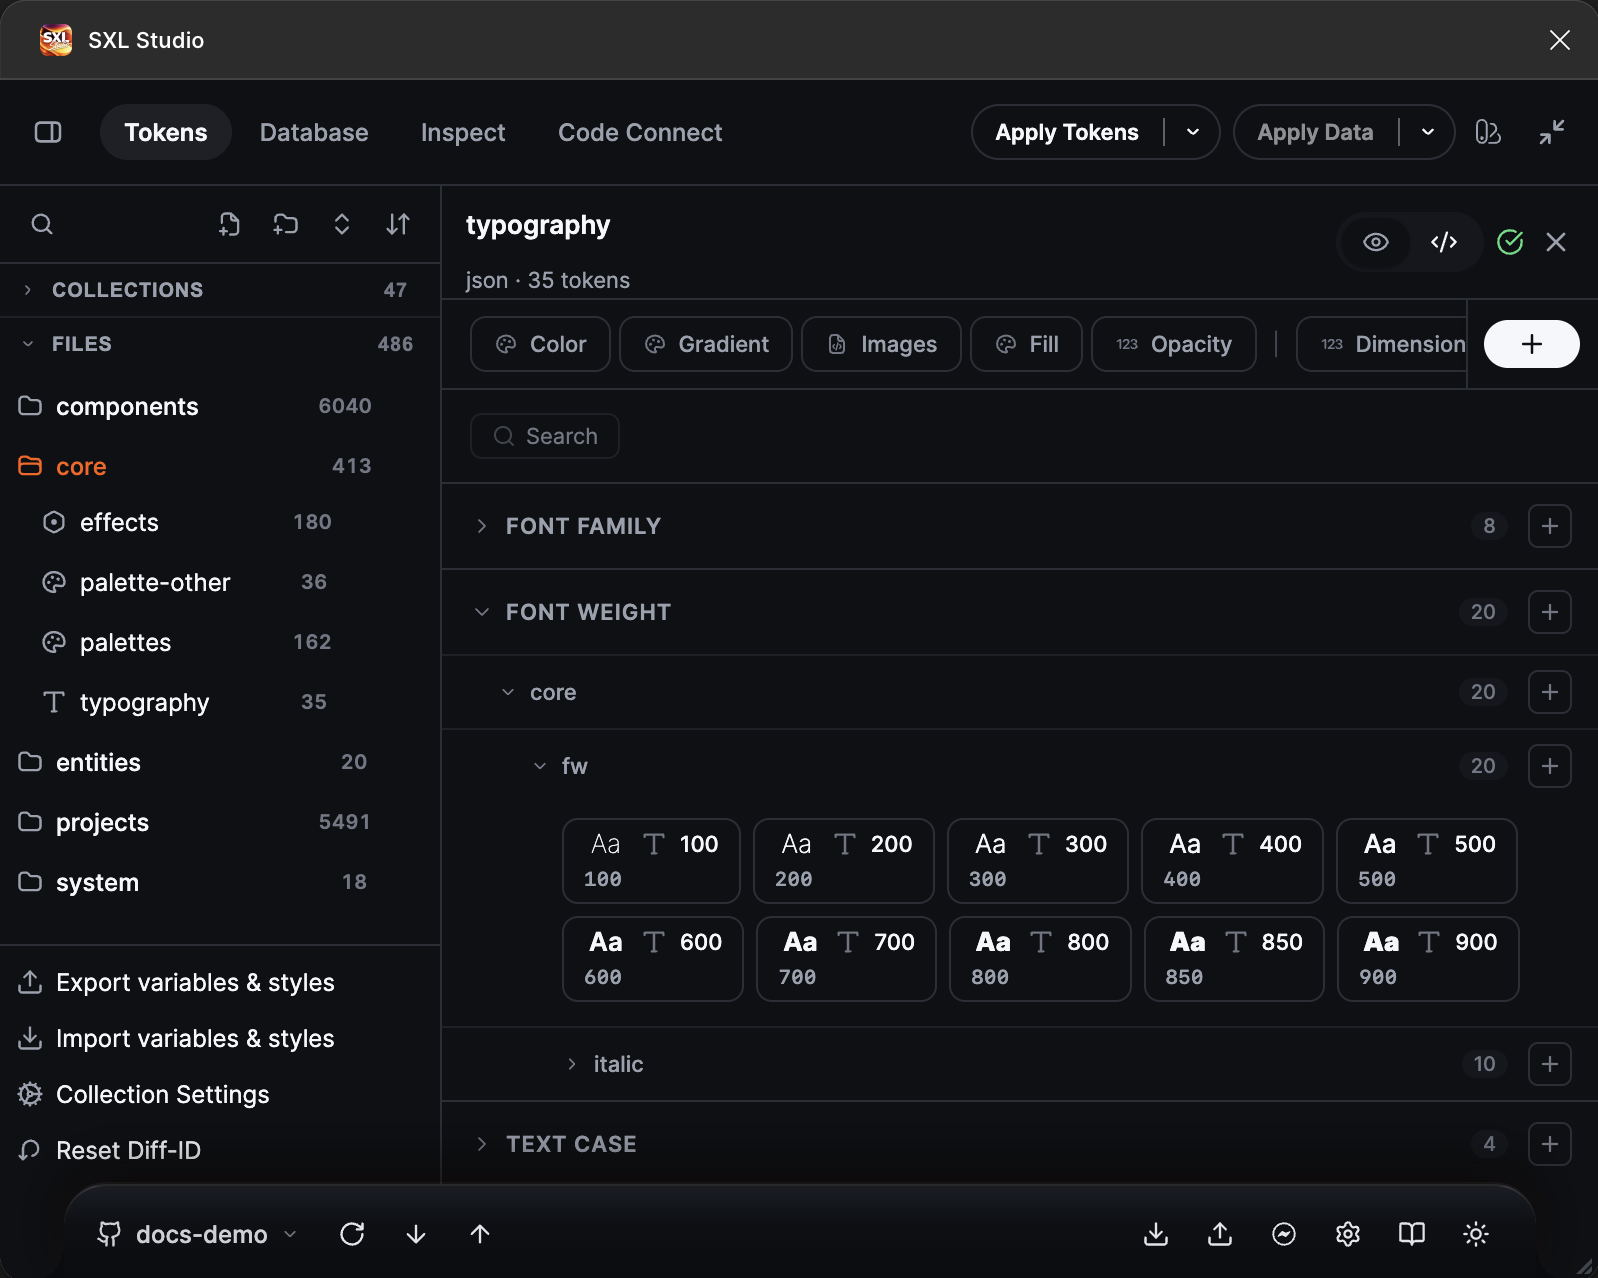
The Tokens tab: the file tree on the left, an open file in the visual editor on the right, the type bar above the token list.
What is on the tab
The file tree
Two sections on the left. Collections lists the collections from config.json: open one to see its tokens as a table by mode, see Collections. Files shows token folders and files; the numbers on the right are token counts.
Above the tree: token search, create a file and a folder, collapse or expand everything, sort. Files and folders can be dragged, renamed, duplicated and deleted through the context menu. Composition and template files have their own icons.
At the bottom of the tree are four actions: Export variables & styles, Import variables & styles, Collection Settings and Reset Diff-ID.
The file editor
Files, collections and composition folders open in tabs above the editor, as in an IDE; the same tab strip serves the datasets and mappings of the Database tab. A folder opens a single browsing tab: walking the folders in the tree swaps its content until you open a file. A click in the tree opens a tab or switches to the one that is already open; the active tab highlights its row in the tree. The file name lives on the tab: a double-click or F2 opens the field, Enter commits, Esc cancels. Only the name changes here, the folder is changed in the tree; a second file with the same name in the same folder is refused. The close control appears on hover; a tab also closes with the middle mouse button and from the context menu (Close, Close others, Close all). Unsaved changes show as a dot instead of the close control plus a denser label; closing such a tab asks whether to save them. The draft of an inactive tab is kept until you save or close it. Open tabs are remembered per workspace, and each tab remembers its view: the Visual / Code mode, the Code cursor and scroll, the Visual scroll and expanded groups. Keyboard in the tab strip: arrows and Home/End move focus, Enter opens, Delete closes, F2 renames.
The strip below the tabs keeps the token count, the Visual / Code toggle, the validity mark and the Save button. An open file is shown in one of two views:
- Visual: tokens grouped by type, each shown as a badge: the name, the computed value and the value as written in JSON (
24px · {core.space.6-x}). Click a group to expand it. Hover a badge to open the token card: the full path and type, a preview (colour, shadow, typography, or the computed number with the formula substituted, e.g.24px = 4px × 6), the value as written and the references it uses with the files that define them. A click on the value or on the preview copies it to the clipboard. When a reference is defined in several mode files, the card names the mode the value is computed for: the one chosen in the mode switcher, otherwise the mode of the open file, otherwise the first mode of the collection in the config. - Code: the whole JSON file with highlighting and validation. The Save button and
Cmd/Ctrl + Ssave the file. While the file is unchanged, the button is disabled.
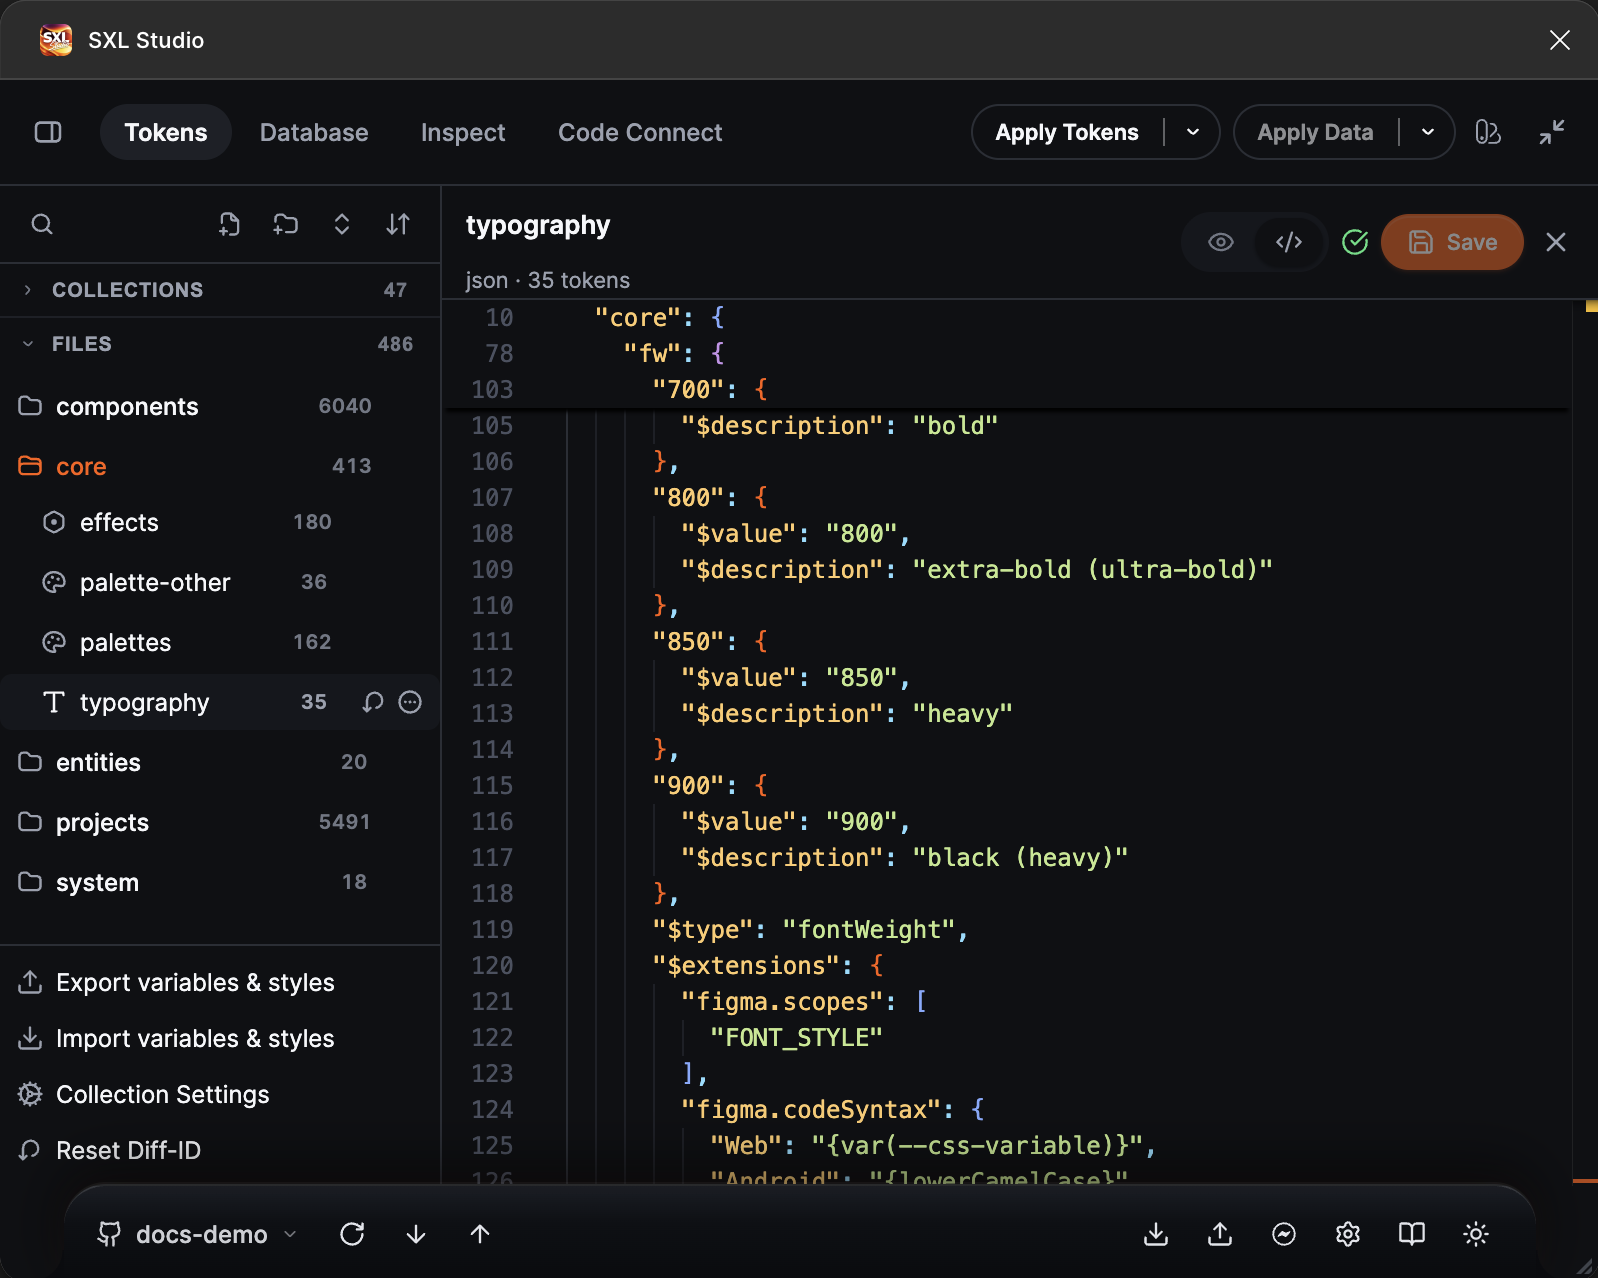
The code editor after saving: the Save button is disabled, there are no changes.
If the file has errors, the N validation issues bar appears above the editor: expand it to see the list with token paths and reasons. While errors exist, saving from the code view is blocked.
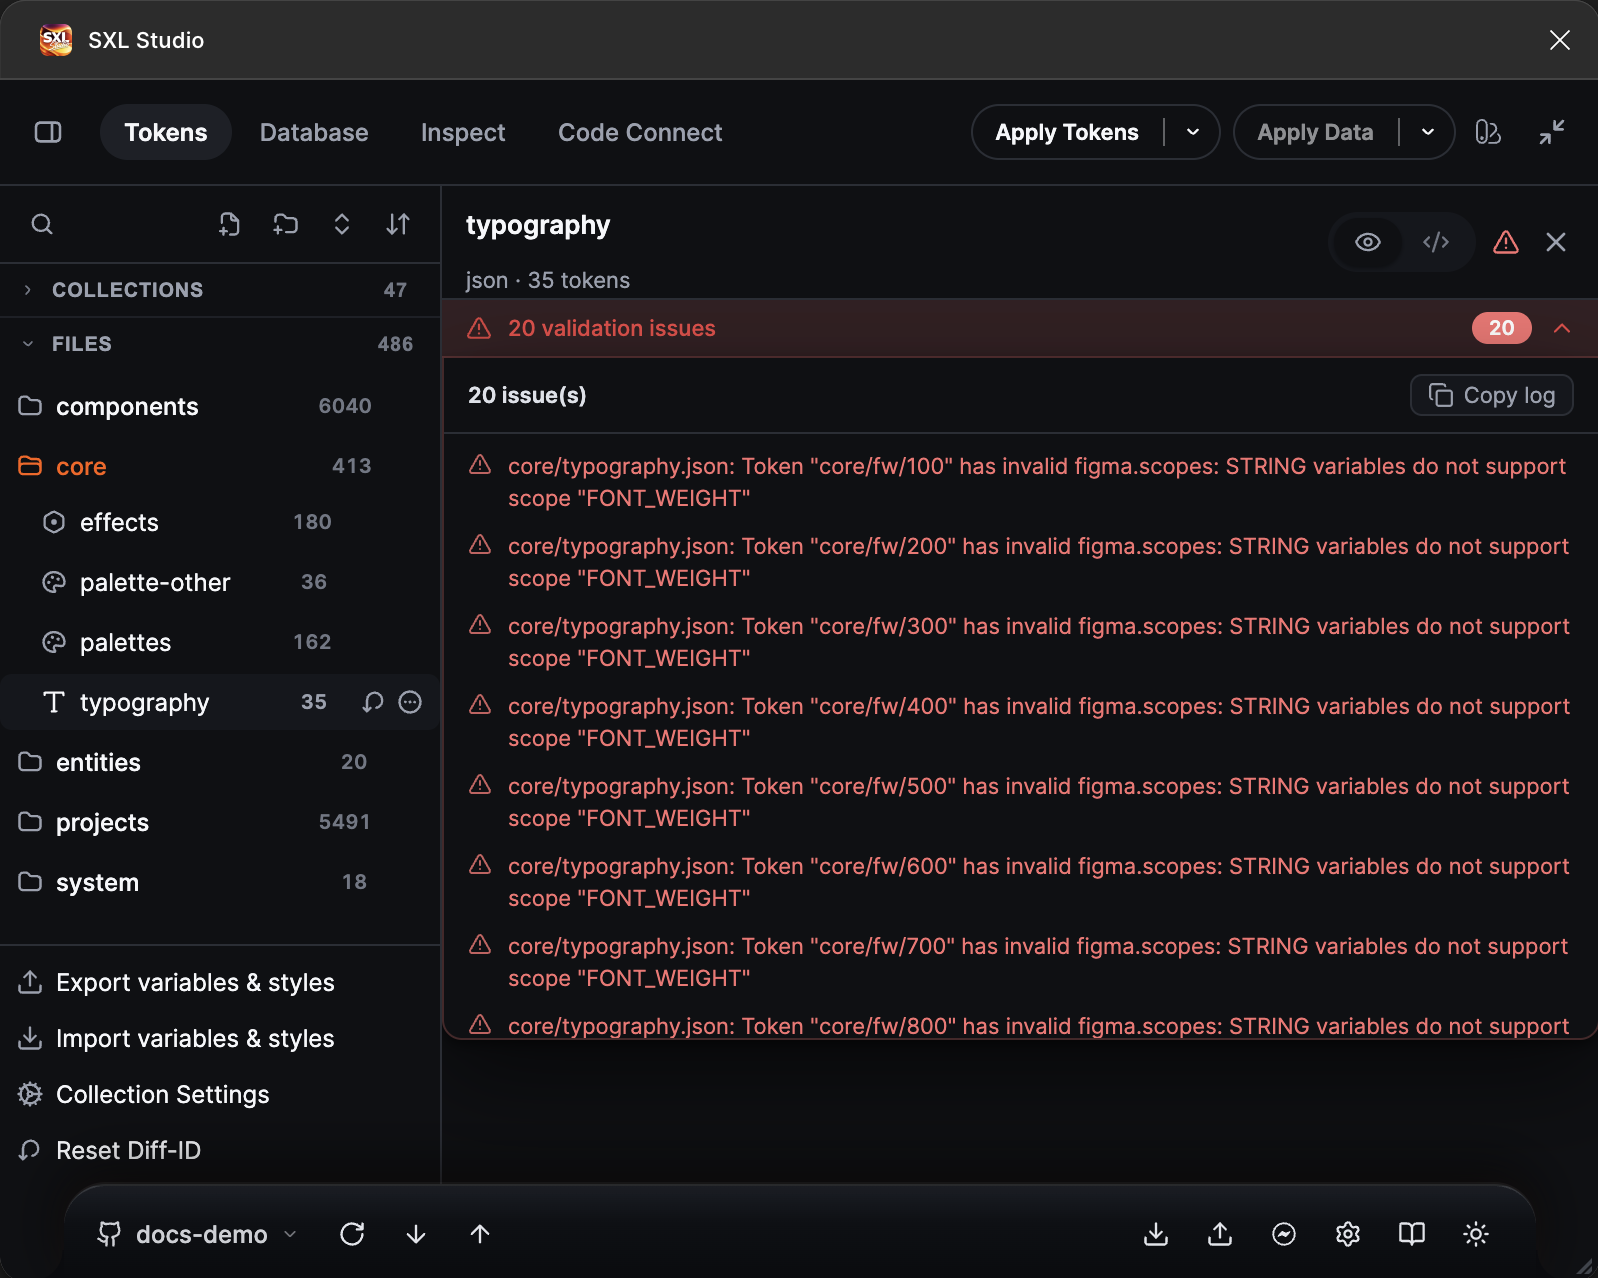
The validation issue list: the fw group has a scope that is not allowed for fontWeight.
Saving is confirmed by the plugin core. If no confirmation arrives within 20 seconds, the editor shows the reason in the strip below the tabs and Save becomes available again; the status command on the Diagnostics tab gives the details.
Create a token
- Open a file in the visual view.
- In the type bar press the type you need, or + for the other types: see Token types.
- Fill in the form: a name as a
group/tokenpath, the value, and if needed a description, scopes, code syntax, colour modifiers. - Press Create. The token appears in its type group and the file is saved.
An existing token is edited through the badge context menu or in the code view. The value can be a number, a string, a reference to another token {group.token} or math: see Token JSON format.
Apply Tokens
The Apply Tokens button in the header binds tokens to Figma layers by name: a layer whose property is named like a token gets the variable or style. The arrow next to it picks the scope: Selection, Page or Document. Running it again restores bindings after manual changes without touching text, component properties and instance swaps.
For compositions Apply creates and updates components from their JSON description: see Composition. You can check what is bound to a layer on the Inspect tab.
Export and import
- Export variables & styles creates and updates Figma variables and styles from the token files. Variables get the Color, Number, String, Boolean, Timing or Easing type, composite tokens become paint, effect, text and grid styles. See Exporting variables and styles.
- Import variables & styles does the reverse: reads the variables and styles of the Figma file and writes them into JSON. See Import from Figma.
- Collection Settings opens
config.jsonin a convenient view: collections, their modes and files, order, library references. - Reset Diff-ID breaks the link between tokens and the variables already created in this Figma file: the next export creates the variables anew. Rarely needed, for example when moving to a new file.
Modes
The Mode context icon in the header shows collection modes and applies them to the selection or page: see Collection modes.
File sources
Token files can live inside the plugin, in a GitHub or GitLab repository or in a folder on disk. The source is switched in the footer: see Token sources and synchronization.
Recommended workflow
- Split primitives and semantic tokens into files; semantic tokens reference primitives.
- Describe collections and modes in Collection Settings.
- Export variables and styles, check the result in Figma's Variables panel.
- Apply tokens to designs as you work; before handing off to developers run Apply Tokens for the page.
- Keep tokens in Git so developers get changes from the same repository.